Centreon “log” table getting insanely huge

Hi there,

I’m currently migrating some old Centreons 2.5/2.6 with Nagios/NDO to Centreon 2.7 with Centreon-Engine/Centreon-broker but I’m experiencing some issues with insanely large MySQL tables to migrate:

This table contains old Nagios logs and according to a forum post it’s being use when clicking on Monitoring > Event logs and is used when doing reporting actions.
Fair enough, I don’t mind anyway of what happened last year, reporting is done on a monthly basis.

So let’s see what is the oldest entry there:

Sadly, it’s using unix timestamp and not MySQL datetime format, so we’ll have to do some conversion to get it humanely-readable.
To be honest, when I started the cleanup the oldest entry was even older.

I’m not sure if Centreon is supposed to clean this out. I guess it does, probably using one of the various cron jobs installed by Centreon but according to my experience this is highly borked and can surely lead to uncleaned entries.

Let’s validate we’re not going to delete bad entries by running a select first

Looks okay. Be sure to compare “ctime” and the converted date and play with the WHERE condition so you can be sure it’s really working properly.
For instance, if you swap “2016-06-08 00:00:00” with “2015-06-14 19:19:01” the last line should disappear.

Once you’ve confirmed your not deleting anything useful, go ahead with a DELETE statement:

I decided to use LIMIT here, to avoid loading too much the server for an unknown time. “time” command has been added here so you can have a measurement of the time required to delete 1 000 000 entries (52s here).

You can now recheck the oldest log you have now:

It seems it’ll be a long way to go before getting to june, 2016 😉

Bonus:
All in one command, so you just have too check your term when coming back from the coffee machine to see its progress:

When the loop keeps outputing the same date, it means DELETE is not removing anything anymore, time to hit ctrl+c !

Let’s have a look to the table size now:

Uh ?

Thanks to Google, it seems I need to run “OPTIMIZE TABLE” to reclaim the freed disk space. But there’re two thing I know about optimize and huge tables like this one:
* It will write lock the table
* It will last for ages (I mean up to *days*)

Let’s try to make this process a bit quicker… Ever heard about eatmydata ?
It’ll will disable fsync() system call, giving you some kind of write cache on steroids; drawbacks: you’re not protected anymore from file corruption in case of a crash.

For now, we’ll take the risk and hack mysql init script to run with eatmydata:

It’s pretty hard to figure out if the trick worked or not. Actually, it’ll set a LD_PRELOAD env variable to override libc calls with the unprotected ones.
Thanks to /proc, we can check this by looking at the mysqld PID attributes

(basically, I get /usr/sbin/mysql pid which is the main MySQL server process and check /proc//environ)

If it worked, you should find a line like this:

We can now run optimize on this table:

You can see it processing by running:

Now you will have to wait a couple of hours for the optimization to complete…

Nginx SSL vhosting using Server Name Indication

Here is the issue: I have a tcp/443 DNAT to a specific machine running some specific HTTPS app that does not work behind a reverse proxy.

Obviously, I want to run others application on 443 and I’m not allowed to get any other port.

Sounds pretty bad, right ?
Actually, there’s a way out and it’s called “nginx-is-so-fuckin-powerfull” 😉

As you may know, a long time ago a feature has been added to TLS which is called “Server Name Indication”. Before this it was impossible to serve multiple virtual hosts on a single address because SSL session was negociated before the client actually sends the requested vhost name.

With SNI, there’s a quick chat between your HTTPS server and the remote browser, something like:

Ok that’s probably not really accurate but who cares about what exactly happens. The thing is: there’s a routing capability before serving the SSL certificate and we know the requested domain name at this point; and guess what: NGINX offers routing possibility using SNI name !!

First thing… You need a really really new NGINX version (1.11.5), but if your distro doesn’t have it you can use NGINX repositories.
Second, you must understand that very old clients may not use SNI. If it doesn’t it will hit the NGINX default vhost. So make sure to keep the old behavior as default, just in case.
Here is the client compatibility list for SNI: https://en.wikipedia.org/wiki/Server_Name_Indication
I leave it to you to decide if you care about handling Internet Explorer < 7. So let's configure NGINX correctly: You need to define a stream {} section on nginx.conf top, just like the http one.

Of course, you need to disable default http/server to listen on port 443 (comment lines like "listen 443 ssl" in all your existing configuration). Now we'll create a stream server, which is a plain TCP proxy: In /etc/nginx/stream.conf.d/443.conf:

And that's it 😀 You can now create a new http/server instance on port 8443 to serve your different new https vhosts but I suggest starting with the default virtual host (/etc/nginx/conf.d/default.conf) by adding "listen 8443 ssl default_server" and some ssl cert and key directives. Here is a example of the stream_443.log:

Nice work NGINX, as usual ! Going further: There's just a little issue here: The real HTTPS on port 8443 will always see incoming IP address as 127.0.0.1. Howerver, there's an overhead called "proxy_protocol" that can help passing proxying related things between NGINX servers but my equipment running behind doesn't like this. So the idea here is to use proxy_protocol between my stream/443 and http/8443 instances and strip it when proxying to original_dest using a dummy stream server that does nothing else that popping out the proxy_protocol data and forwarding to the real server. Then I will restore remote_addr in http/8443. The new config file is now:

In the http/8443 vhost, we set the following to restore original client IP address:

Nginx -_- Bonus stuff: I case you're having issue with SELinux (and you will, for instance it will deny NGINX to start a connection from port 8080 to a remote host), you can use the following to extract failures from audit.log and turn them into a permanent SELinux exception

Disable HiLink mode and force tty modem on NEW Huawei E3272

There’s plenty of documentation on Internet related to this issue but none of them works with recents firmware. They all talk about using the embedded web interface and force serial mode through some call and then send an AT command to choose default mode.
It’s not working ANYMORE on 22.470.07.00.00 firmware.

And sorry, you’ll need a Windows computer for this… (probably a clean pre-Windows 8 one)

First you need to confirm that your modem is actually working correctly in HiLink mode.
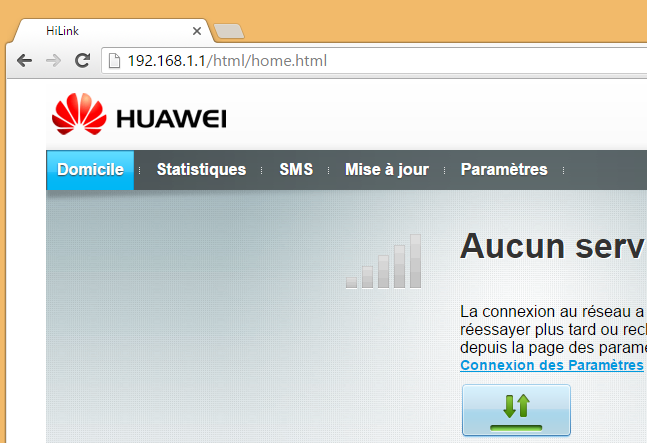
Plug it and wait for the browser to open automatically:
00_HiLink_web_interface

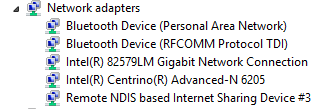
You should confirm from device manager that there’s a new NDIS network interface
01_NDIS_network_interface

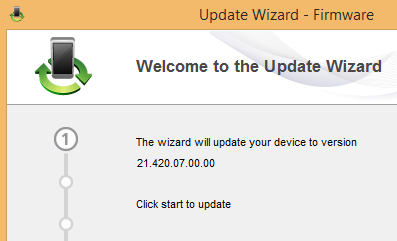
Run E3272s_Update_21.420.07.00.00.exe which is a firmware installer containing an older version that permits default mode change
02_Firmware_downgrade

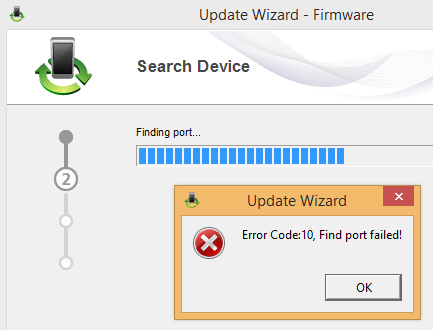
After a while it will fail with the error below. The firmware updater turned the device into serial mode but there’s no driver available
04_Device_not_found

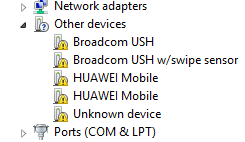
Confirm from device manager that there’re some unknown devices
05_Unrecognized_devices

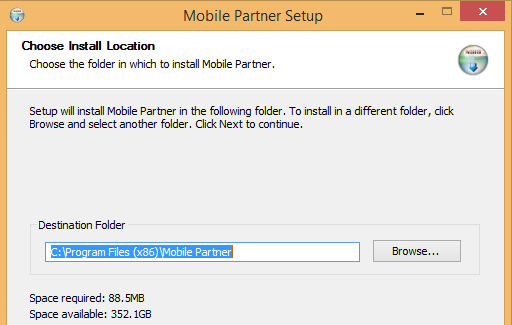
Install Mobile Partner from Huawei and fix the driver file because it doesn’t contain the IDs for this device
02_Install_Mobile_Partner

Go to C:\Program Files (x86) \Mobile Partner\Driver\Driver\X64 (for 64 bits system)
and edit ewser2k.inf file.

In the [QcomSerialPort.NTamd64], add the two following lines

%QcomDevice00% = QportInstall01, USB\VID_12d1&PID_1442&MI_00
%QcomDevice01% = QportInstall00, USB\VID_12d1&PID_1442&MI_01

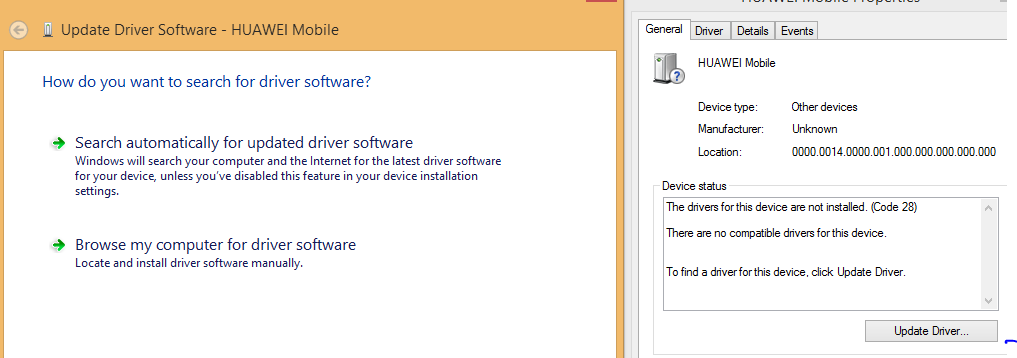
Now go back to device manager and update driver by choosing the path containing the inf file
06_Update_driver_locally
07_Select_directory

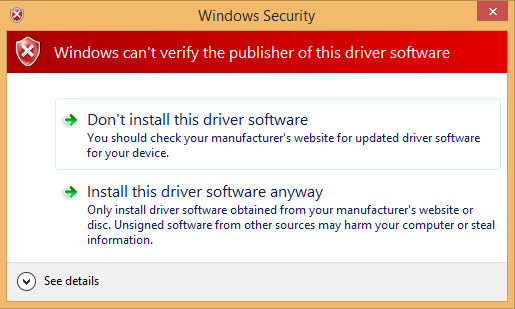
If you get this error, you need to disable driver signature verification first (google for it).
BE SURE TO RESTART FIRMWARE UPDATER BEFORE TRYING TO FIX THE DRIVERS AGAIN OTHERWISE IT WONT BE TURNED INTO SERIAL MODE.
09_Driver_installing

After a successful installation you should now see two additional COM ports
10_Driver_installed_succesfully

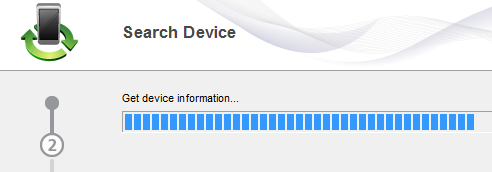
Start the firmware updater and wait a bit
11_Upgrade_step_2

On my Windows 8.1 computer it gets stuck here and fails with an error but it worked correctly on Windows 7…

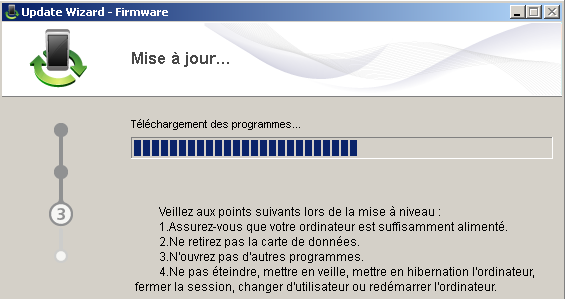
Here is what you should see if it’s working correctly
00_Upgrade_in_progress

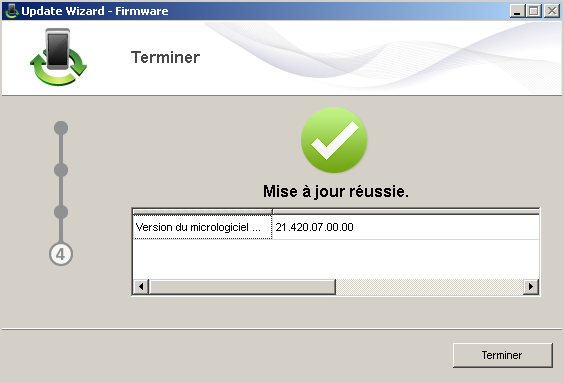
Finally, the success message saying you firmware has been downgraded to 21.xx
00_Upgrade_succeeded

Now we have access to the serial port and we’ll have to issue a few AT command to set a new default mode. Find the COM port used by your modem now
00_COM_device

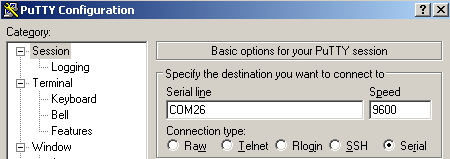
And start Putty on it
00_Putty_connection

Now we can send a few command (press Enter key at the end)

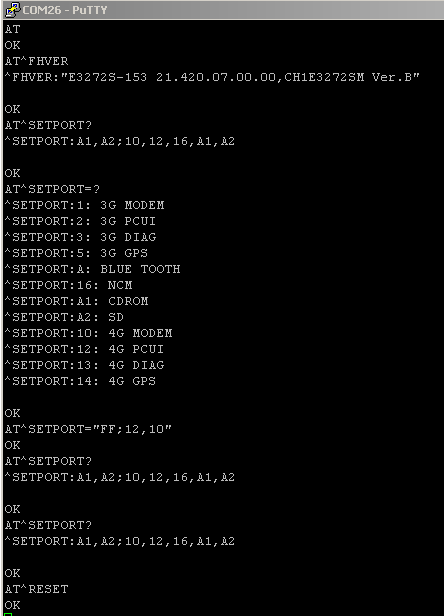
AT: Will reply "OK", it means your actually talking to someone understanding AT commands
AT^FHVER: Confirm you are running firmware 21.xx
AT^SETPORT?: Show current modem default config
AT^SETPORT=?: Display available modes
AT^SETPORT="FF;10,12": Enable diag interface and classic serial based modem emulation (this is what we need to use with wvdial)
AT^RESET: Restart the modem

Screenshot below are a bit wrong: I used AT^SETPORT=”FF;12,10″ instead of AT^SETPORT=”FF;10,12″ so the modem is on ttyUSB1 instead of ttyUSB0 !

Here you can see my AT session (please note that AT^SETPORT? won’t refresh until the modem is restarted)
00_Putty_session

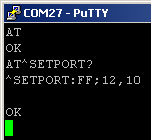
After issuing AT^RESET the COM id will change (probably increased by 1), you can restart Putty and check default mode is now the one expected.
00_Putty_after_reset

You can now restart Linux and enjoy the stick being detected correctly now:

Aug 18 22:58:23 thrall kernel: [ 283.080966] usb 5-1.2: new high-speed USB device number 5 using xhci_hcd
Aug 18 22:58:23 thrall kernel: [ 283.173491] usb 5-1.2: New USB device found, idVendor=12d1, idProduct=1506
Aug 18 22:58:23 thrall kernel: [ 283.173496] usb 5-1.2: New USB device strings: Mfr=2, Product=1, SerialNumber=0
Aug 18 22:58:23 thrall kernel: [ 283.173497] usb 5-1.2: Product: HUAWEI Mobile
Aug 18 22:58:23 thrall kernel: [ 283.173499] usb 5-1.2: Manufacturer: HUAWEI Technology
Aug 18 22:58:23 thrall kernel: [ 283.184269] usbcore: registered new interface driver usbserial
Aug 18 22:58:23 thrall kernel: [ 283.184280] usbcore: registered new interface driver usbserial_generic
Aug 18 22:58:23 thrall kernel: [ 283.184287] usbserial: USB Serial support registered for generic
Aug 18 22:58:23 thrall kernel: [ 283.186411] usbcore: registered new interface driver option
Aug 18 22:58:23 thrall kernel: [ 283.186422] usbserial: USB Serial support registered for GSM modem (1-port)
Aug 18 22:58:23 thrall kernel: [ 283.186513] option 5-1.2:1.0: GSM modem (1-port) converter detected
Aug 18 22:58:23 thrall kernel: [ 283.186597] usb 5-1.2: GSM modem (1-port) converter now attached to ttyUSB0
Aug 18 22:58:23 thrall kernel: [ 283.186613] option 5-1.2:1.1: GSM modem (1-port) converter detected
Aug 18 22:58:23 thrall kernel: [ 283.186656] usb 5-1.2: GSM modem (1-port) converter now attached to ttyUSB1

Modem is on /dev/ttyUSB0.

Bonus stuff:

Udev rules that will create /dev/gsm0 (in case you have other /dev/ttyUSBx):

SUBSYSTEM=="tty", ATTRS{idVendor}=="12d1", ATTRS{idProduct}=="1506", SYMLINK+="gsm%n"

And a working wvdial configuration (PIN code disabled, POST.lu APN so you probably want to change this, no user, no password):

[Dialer Defaults]
Init1 = ATZ
Init2 = AT+CGDCONT=1,"IP","web.pt.lu"
Stupid Mode = 1
MessageEndPoint = "0x01"
Modem Type = Analog Modem
ISDN = 0
Phone = *99#
Modem = /dev/gsm0
Username = { }
Password = { }
Baud = 460800
Auto Reconnect = on

Finally, a systemd service file with autorestart

[Unit]
Description=wvdial

[Service]
Type=simple
ExecStart=/usr/bin/wvdial
RestartSec=2
Restart=always

[Install]
WantedBy=multi-user.target

Fixing non-working iDrac on PowerEdge server (R610)

It seems Dell released a couple of servers with a broken embedded iDirac.
Actually the issue comes from the on-board Broadcom ethernet chip which is not configured correctly: http://permalink.gmane.org/gmane.linux.hardware.dell.poweredge/42033

Spot the issue

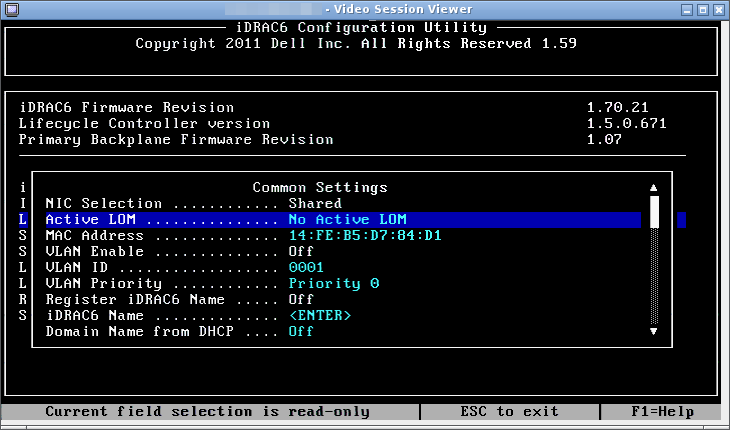
Here is how to confirm your issue is related to this bug and not something else. Boot the server and press CTRL+E to get into the iDrac BIOS. Select the network submenu and check the Active LOM entry. LOM stands for LAN On Motherboard.

If it says No Active LOM even if you selected Shared above, it means the iDrac is unable to bind on any on-board LAN, this means you are having this issue.

01_broken_lom

Then, we’ll create a DOS-based floppy disk image containing some Broadcom firmware related tools that will reconfigure the embedded network controller so it can be use for the iDrac board.

Create a PXE bootable disk image with Broadcom utilities

Download Bcom_LAN_14.2.x_DOSUtilities_A03.exe from http://www.dell.com/support/home/us/en/19/Drivers/DriversDetails?driverId=29DKK and get a terminal in the download directory.

We will now dowload a FreeDOS disk image (that can be PXE booted) and we’ll add the required tools in the image.


wget http://www.ibiblio.org/pub/micro/pc-stuff/freedos/files/distributions/1.0/fdboot.img
mkdir mount
sudo mount -t vfat -o loop fdboot.img mount/

unzip Bcom_LAN_14.2.x_DOSUtilities_A03.exe
sudo cp ./Userdiag/NetXtremeII/uxdiag.exe mount/

sudo sh -c 'echo uxdiag -t abcd -mfw 1 > mount/idrac.bat'

sudo umount mount

mv fdboot.img fdboot-fix-poweredge-idrac.img

Now we have a FreeDOS containing Broadcom uxdiag tool as well as a idrac.bat script that will start the required command.

Copy the img file to your PXE server and set the following to start it with PXELinux (pxelinux.cfg/default):

LABEL fix-idrac
KERNEL memdisk
APPEND initrd=fdboot-fix-poweredge-idrac.img

If you don’t have memdisk binary it can be found in package syslinux-common.

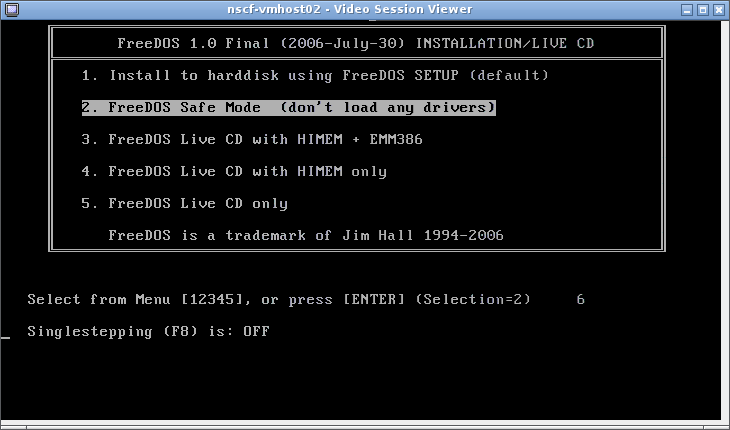
Then you can restart your server and trigger a PXE boot. Once FreeDOS starts, select the Safe Mode entry (I had some issue of memory being full when using another entry).

02_freedos_booting

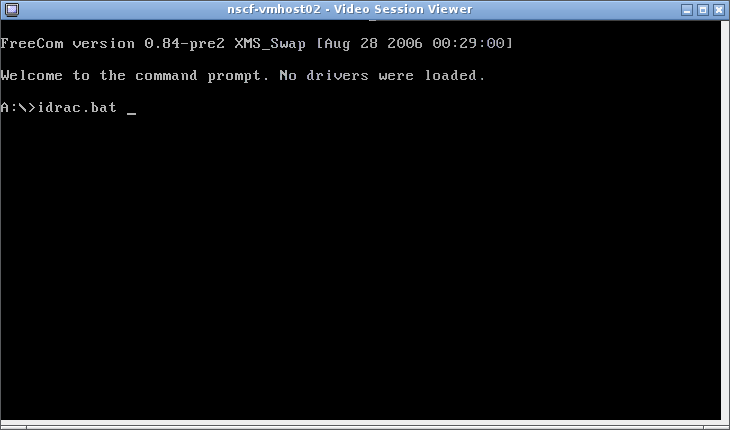
Then, type idract.bat to start the batch script we added inside the disk image:

03_run_script

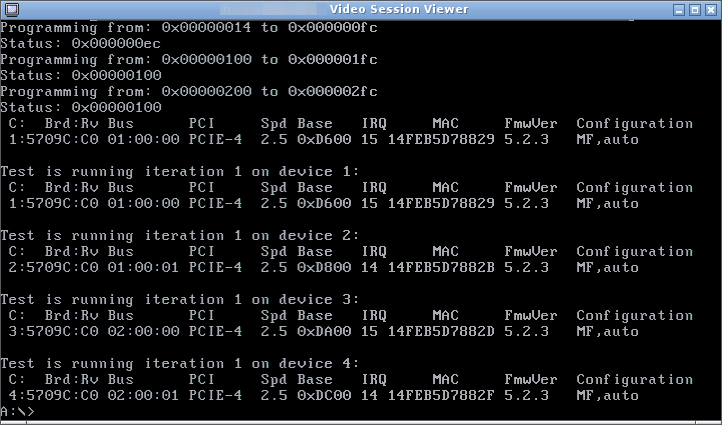
Broadcom tools will run for a couple of seconds and output something like this:

04_uxdiag_processing

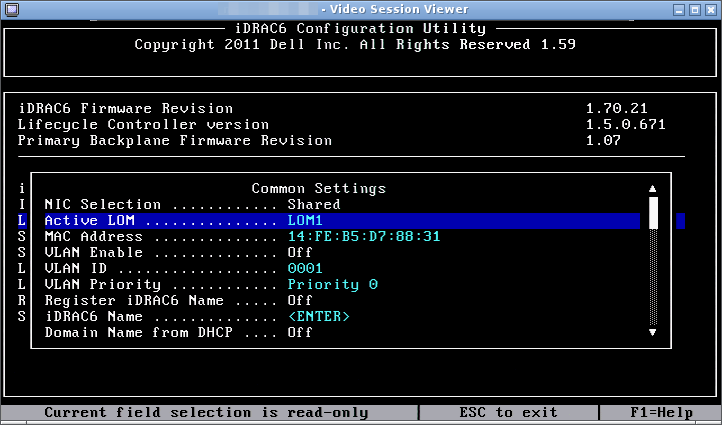
Restart the server and hit CTRL+E to get inside the iDrac again; it’s now binding on LOM1 aka the ethernet port with label “1”:

05_fixed_lom

Master-master simple email server with Dovecot

The purpose of this article is to explain how to create an hight availability email server with Dovecot.
We will use internal plain text files as users backend but it can of course easily be extended to use LDAP or SQL, but this article won’t cover this setup.

Install required packages

On both servers we’ll install dovecot as well as the POP3 and IMAP backends

To use dovecot clustering feature, known as dsync, we need dovecot 2.2 or later. Debian Jessie’s version is ok.

Setup file-based users database

Edit /etc/dovecot/conf.d/auth-passwdfile.conf.ext and set both userdb and passworddb like this:

I will use plaintext clear password here because I really want to be able to read the users from the configuration file directly. You can of course use an encrypted format, see Dovecot documentation.

The file /etc/dovecot/users will contains the users accounts and we’ll deliver all emails using paths like /srv/vmail/user@domain.com.
Dovecot is set up to always use the vmail user with mail group to avoid uid/gids madness.

First I tried to create a multi-domain setup, using “username_format=%n /etc/dovecot/%d/users” and “default_fields = uid=vmail gid=mail home=/srv/vmail/%d/%n” but current master/master plugin is unable to handle such configuration (Error: passwd-file: User iteration isn’t currently supported with %variable paths) so I decided to use a single authentication file using email as login (%u instead of %n).

We need to create the system user for dovecot:

Now we need to enable this backend by commenting auth-system and un-commenting auth-passwdfile from /etc/dovecot/conf.d/10-auth.conf

Configure Postfix to use Dovecot as delivery agent

In /etc/postfix/master.cf add the following section:

Then run the following command to make sure Postfix is configured correctly (postconf is a command that will edit main.cf config file):

Please MAKE SURE your /etc/hosts and /etc/hostname are configured correctly !
The following commands should return short/full/domain names:

Now we’ll enable Dovecot LDAP and enable our mail domain:

Additional Dovecot config

In /etc/dovecot/conf.d/10-mail.conf set

It will deliver emails in Maildir format like this: /srv/vmail/user@domain.com/Maildir

In /etc/dovecot/conf.d/10-auth.conf we’ll enable plain text login because we don’t care about SSL and stuff (non-encrypted auth is disabled for any host except localhost by default):

Create first user and try it

Create /etc/dovecot/users with the following content:

And secure the file permissions:

Finally restart dovecot, postfix and send a test email:

You should see something like this in the logs:

The key part here is dovecot: lda(test@domain.com): msgid=: saved mail to INBOX.

We can now check what happened on the filesystem:

Now we can test IMAP login will the following transcript using telnet:

You should see the message body containing “test”. If so, we now have a fully working email server.

Enable doveadm service and replication plugin

Create a new file /etc/dovecot/local.conf with the following content:

Then we’ll configure the peer address for replication plugin in /etc/dovecot/conf.d/90-plugin.conf:

Now we will globally enable the replication plugin as well as the notify one (required), in /etc/dovecot/conf.d/10-mail.conf:

And that’s it… Yes, really, we’re done here !

Replicate config to secondary server

Here is my synchronisation script

Basically it sync the whole Postfix and Dovecot postfix, replace the hostname by the secondary server one in Postfix configuration and change the address in Dovecot’s mail_replica setting.

You can now run echo test | mail -s test test@domain.com on both server and check that both filesystems are updated with all emails 🙂

Of course, you can now connect two Thunderbird instances against 1.2.3.4 and 5.6.7.8 and then create folder, move emails, toggle read flag. Both will show the change with a very little delay.

Thanks for reading and I hope that will help

Stop backscattering when using Postfix as an Exchange frontend

Hey,

Not much to say here because everything is already explained in the GitHub README file.

In a few words, I wrote a script that extracts from Active Directory LDAP all Exchange email addresses and export this as a Postfix map. The idea is to be able to reject invalid recipients instead of whitelisting the whole domain. By doing this, your infrastructure will stop sending “non-delivery notifications” back to forged sender addresses because you let some invalid recipient emails go into your system.

Everything is available there:
https://github.com/eLvErDe/exchange-active-directory-to-postfix-map

Fighting DNS flood with Shorewall

Hello,

One of my server had the whole syslog full of lines like this:

And it was happening for a long time. It wasn’t a big deal because the request is denied anyway until I had to do some serious modification on this server and discovered that syslog was nearly unusable, thanks to this amazing flood:

It seems to be impossible to have fine-grained logging with bind9, so I decided to try something else: let’s use shorewall (iptables frontend) to drop all pattern matching “x99moyu.net” (all requests are against this specific domain).

Let’s give iptables a try:

Yeah! Syslog stopped complaining. However, I’m not really happy with solution:

  • TCP is not handled as well
  • IPV6 isn’t either
  • It matches x99moyu instead of x99moyu.net
  • It’s not integrated into the system
  • It’s not self-documenting

Let’s try to figure out how to match the whole domain first:

Won’t work. In fact, the DNS request in constructed a different way:
http://stackoverflow.com/questions/14096966/can-iptables-allow-dns-queries-only-for-a-certain-domain-name?answertab=votes#tab-top

If you look at the contents of the DNS request packet in wireshark or similar you will find that the dot character is not used. Each part of the domain name is a counted string, so the actual bytes of the request for google.com will be:

06 67 6f 6f 67 6c 65 03 63 6f 6d
The first byte (06) is the length of google, followed by the 6 ASCII characters, then a count byte (03) for the length of com followed by… you get the idea.

Yep, I got it. We’ll also need to do a “hex” match instead of a simple string:

Here we go, here’s the proper iptable line to use, now we can integrate it into our /etc/shorewall/rules and /etc/shorewall6/rules above the “DNS/ACCEPT” line.

# With logging (x99moy is a "tag" displayed in the log lines, limited to 6 chars)
#DNS/DROP:info:x99moy loc fw ; -m string --algo bm --hex-string "|07|x99moyu|03|net"
# Without logging
DNS/DROP loc fw ; -m string --algo bm --hex-string "|07|x99moyu|03|net"


A short story about PHP CMS, Spam, RBL and Postfix rate-limiting

We had some issues today, at work, with a PHP-based CMS (hello |*@#-?! joomla) being used as a spam gateway.


  • The root cause (Joomla)

I fixed the issue by figuring out what was the broken PHP file using findbot.pl tool from abuseat.org. But my main concerns is that there’s no way to prevent this to happen again. PHP is broken by design, especially while being used for a CMS.

Abuseat’s script helped me to find suspicious code, then confirmed by the apache logs:

In the meanwhile, Joomla has been updated an hopefully the security issue has been fixed.
After removing the bad file, the owner of my turned-into-a-spambox-cms looks being annoyed and seemed to try break-in again:

No thanks, really. It’s been a pleasure but it’s time for me to move on:


  • Preventing this from happening again ?

So how could you care about this ? First thing, be sure to not mess your main SMTP IP address with it. Be sure to relay the CMS emails throught a specific dedicated SMTP server that’s not hidden being the same NAT as your main SMTP server. Otherwise, you will get blacklisted as soon as any flows open in Joomla.

To ensure you’re fine, you can use one the multi-rbl checks online like anti-abuse.org or senderbase.org by Cisco. If you’re not listed here, you’re probably fine. Otherwise it’s time to ask for removal on any blacklist and be patient. Your SMTP server won’t be trusted again until at least a couple of hours, probably couple of days to be un-blacklisted on the whole Internet.

Of course, you may consider upgrading Joomla, changing password and avoid having thousands of useless plugins, but I guess you’re not in charge of this Joomla website, right ?

Another thing that may help is to enable some PHP hardening tool called “suhosin“. It wasn’t ready while Debian Jessie has been released, so we’ll use the official upstream repository to get it.

Here’s an extract of my docker file to enable this extension:


  • Treat the symptoms, as well as the cause

So now, you’re using a different SMTP to relay emails coming from the insecure website… To avoid spaming the world and/or overloading the internet connection, we’ll setup rate-limiting on the postfix server.

We’ll use postfwd for this.

If using Debian Wheezy, make sure to get the one from backports, the default one is completly broken.

Then, we set-up a rule limiting enforcing each client_address (IP connecting this SMTP server) to not send more than 5 emails every 5 minutes.

Create new /etc/postfix/postfwd.cf configuration file containing the following:

Then set STARTUP=1 in /etc/default/postfwd.

Then, edit your postfix configuration in /etc/postfix/main.cf to add a new smtpd_recipient_restrictions setting like this:

The check_policy_service will check postfwd running on port 10040 which will return either permit or deny. Postfwd will reply with a 450 temporary error if the rate has been exceeded.

Beware of the order, in this example, even hosts being allowed to relay emails with this SMTP server, listed in $mynetworks, have been rate-limited.
The reason is that this SMTP server is outside main corporate network and I don’t trust any of the hosts using it.

Here’s another snippet from a production server:

If you don’t have this setting yet, you can get the default value on your system by running

I suggest to always add “permit” as the last action, even if it’s implicit it’s way more easy to understand the workflow by adding it.

You can now restart both service and check the log files:

Of course, postfwd has many more feature, check its online documentation !

Fixing suspend on ACPI 5.0 motherboards

2015-06-09: Current state on Linux 4.0

Today I got really pissed of to see than mw Debian testing machine was still unable to resume correctly from suspend out of the box…
So I decided to upgrade to kernel 4.0 and update motherboard BIOS to the latest release: no luck.

While looking at Google about that issue I finally found out some information… right here, on my own blog. That was quite disappointing.

I figured out I still had all these error message, just like 3 years ago:

So what happened with that patch fixing the issue in 2012 ? Does it got rejected ? Lost somewhere in some random git space ?
I checked the official git master branch and the fix was applied. The idea was good again, no luck.

Finally, I figured out the issue was triggered by some (new?) ACPI/SATA related stuff that were probably not existing in 2012.

The proper fix is simply to boot your kernel with libata.noacpi=1 and resume works again, YAY \o/

To make it permanent on Debian, edit /etc/default/grub and set the following line:

Then regenerate grub config by running update-grub.

After a reboot I checked my ACPI related error message:

That’s a lot less and suspend seems to be reliable so far.


Original post from 2012

There’s a bunch of new motherboard coming which uses ACPI 5.0 however it’s not supported yet by Linux kernel.

If you own a recent Asus motherboard (seems to append on P67, H67 & Z68 chipset based series) and your computer suspend just fine but never wakes up, you may really love this post 😉

Here we go, check if your is affected by this bug:

If you see lines looking like this:

Great, you should be able to fix your suspend issue !

Next step is quite easy. We’re going to build latest 3.2.1 kernel patched with ACPICA_Fix_to_allow_region_arguments_to_reference_other_scopes.

Install latest 3.2 kernel from Debian and compilation tools:

Download and extract 3.2.1 kernel sources:

Download the patch attached to this blog post, and apply it:

Copy debian’s 3.2 kernel config:

Start building…. (Use -j N, N = number of CPU cores)

It will ask for a few new config options (drivers added between 3.2.0-rc7 and 3.2.1), just accept default settings.

Install new kernel:

On my system, the initrd has been updated automatically using the debian way. Despite it’s 100Mb (??), it works as excepted.

After rebooting on this new kernel, you should be able to suspend and resume sucessfully.

References:
GIT commit in linux-next
ArchLinux forum topic who gave me the right fix
ACPI devel mailing list archive

Known motherboard affected by this bug:
Asus P8Z68-V LX
Asus P8Z68-V LE
Asus P8H67

Future:
According to a co-worker (kernel developper), the patch has been committed to linux-next GIT repository, so it should be integrated to official kernel release starting on version 3.4.

Postfix: SSL relayhost

Hi,

Here is a quick workaround to make postfix use a remote server as a relay (aka “relayhost“) using SSL on port 465.

The idea is to setup a stunnel daemon on a random local port which will operates as an SSL TCP proxy to your real server.

Then, edit /etc/stunnel/stunnel.conf, comment the “cert = /etc/stunnel/mail.pem” line an any built-in proxy ([pop3s], [imaps]…).

Add a new section:

Enable stunnel daemon by setting ENABLED=1 in /etc/default/stunnel4.

Restart stunnel:

Add the following settings in /etc/postfix/main.cf:

And restart the service:

You should now see something like this in your log file: